MPPT Solar Charge Controller Manual: A Comprehensive Guide
This manual details optimizing solar energy harvesting, regulating power flow to batteries, preventing damage, and extending battery lifespan․ It’s crucial for off-grid systems and self-reliance․
Understanding Solar Charge Controllers
Solar charge controllers are fundamental components within any photovoltaic (PV) system, acting as intelligent regulators between solar panels and batteries․ Their primary function is to control the voltage and current flowing from the solar panels, preventing overcharging – a critical issue that can severely damage batteries and reduce their lifespan․ Without a charge controller, batteries are vulnerable to degradation, leading to reduced performance and premature failure․
These devices aren’t simply on/off switches; they actively manage the charging process, ensuring batteries receive the optimal amount of power for their specific chemistry and capacity․ Different types of charge controllers exist, each with varying levels of sophistication and efficiency․ Traditional PWM (Pulse Width Modulation) controllers are simpler and more affordable, while more advanced MPPT (Maximum Power Point Tracking) controllers offer significantly improved performance, especially in challenging conditions․
The core purpose is to maximize energy harvest and protect the investment in the solar power system․ They are essential for both small, off-grid applications like garden sheds and larger, more complex installations providing power to homes or businesses․ Understanding the role of a charge controller is the first step towards building a reliable and efficient solar power solution․
What is an MPPT Solar Charge Controller?
An MPPT (Maximum Power Point Tracking) solar charge controller is a sophisticated device that optimizes the energy harvest from solar panels․ Unlike traditional PWM controllers, MPPT controllers don’t simply divert excess power; they actively seek the voltage and current combination that yields the maximum power output from the panels, constantly adjusting to changing conditions like sunlight intensity and temperature․
This “tracking” capability is the key to its efficiency․ Solar panels have a specific operating point where they produce the most power․ MPPT controllers locate this point and ensure the panels operate there, even when the battery voltage is lower․ This is achieved through a DC-DC converter, which efficiently transforms the higher voltage from the panels to the lower voltage required by the batteries․
Modern MPPT controllers, like those from Everon Energy Systems, often include IoT-enabled features for remote monitoring and control․ They are particularly beneficial in situations where panel voltage significantly exceeds battery voltage, or when dealing with partially shaded panels, maximizing energy yield and system performance․ They represent a significant advancement in solar charging technology․
Benefits of Using MPPT Technology
Employing MPPT technology in your solar power system delivers substantial advantages․ Primarily, it significantly increases energy harvest – often up to 30% more than traditional PWM controllers – by maximizing power transfer from the solar panels to the batteries, especially in suboptimal conditions․
This enhanced efficiency translates to faster battery charging and improved system performance, particularly valuable for off-grid applications like powering garden sheds or clubhouses․ MPPT controllers excel at handling variations in sunlight, maintaining optimal charging even with partial shading or fluctuating light levels․
Furthermore, MPPT controllers extend battery life by ensuring they receive the correct charging voltage and current, preventing overcharging or undercharging․ Schneider Electric’s MPPT 100 600 controller exemplifies this benefit, offering homeowners greater self-reliance․ The Global Charge Controllers Market is growing, driven by demand for these efficiencies, and MPPT technology is at the forefront of this expansion, offering a superior return on investment․
Key Components of an MPPT Charge Controller
An MPPT charge controller comprises several crucial components working in harmony․ The core is the DC-DC converter, responsible for efficiently stepping down the higher voltage from the solar panels to the lower voltage required by the batteries, while maximizing current․

Microcontrollers are integral, constantly monitoring panel voltage and current, calculating the maximum power point, and adjusting the DC-DC converter accordingly․ Input protection circuitry safeguards against reverse polarity, overvoltage, and short circuits, ensuring system reliability․
Heat sinks dissipate heat generated by the internal components, maintaining optimal operating temperatures․ Display interfaces, often LCD screens, provide real-time data on system performance, including voltage, current, and charging status․ Communication ports, like USB or RS485, enable remote monitoring and control, as seen in Everon Energy Systems’ IoT-enabled controllers․ Finally, robust terminal blocks facilitate secure wiring connections for both solar panels and batteries․
Voltage and Current Ratings

Understanding voltage and current ratings is paramount for selecting the correct MPPT charge controller․ Solar panel voltage (Voc – open circuit voltage) must remain within the controller’s input voltage range; exceeding it can cause damage․ Similarly, the controller’s maximum input current must accommodate the short-circuit current (Isc) of the solar array․
Battery voltage is equally critical․ Controllers are designed for specific battery voltages (12V, 24V, 48V, etc․)․ Mismatched voltages lead to inefficient charging or potential harm to the battery․ The controller’s output current rating dictates the maximum charging current it can deliver to the batteries․

Schneider Electric’s MPPT 100 600 exemplifies this, catering to homeowner self-reliance․ Always factor in a safety margin – choose a controller with ratings exceeding your system’s expected values․ Properly sized ratings ensure optimal performance, longevity, and prevent system failures, as a charge controller maintains voltage and current rates․
Battery Compatibility
MPPT charge controllers aren’t universally compatible with all battery types․ Ensuring compatibility is vital for efficient charging and prolonged battery life․ Lead-acid batteries (flooded, AGM, gel) are commonly supported, but specific charging profiles are needed for each type․ Lithium-ion batteries require controllers with dedicated lithium charging algorithms to prevent overcharge or damage․
Incorrect settings can drastically reduce battery lifespan․ Many MPPT controllers offer selectable battery type settings, allowing customization of charging voltage and current․ Some advanced controllers feature temperature compensation, adjusting charging parameters based on battery temperature for optimal performance․
Everon Energy Systems’ IoT-enabled controllers demonstrate a focus on efficiency․ Always consult the controller’s manual and battery manufacturer’s specifications to confirm compatibility and recommended charging parameters․ Prioritizing compatibility safeguards your investment and maximizes the benefits of your solar power system․
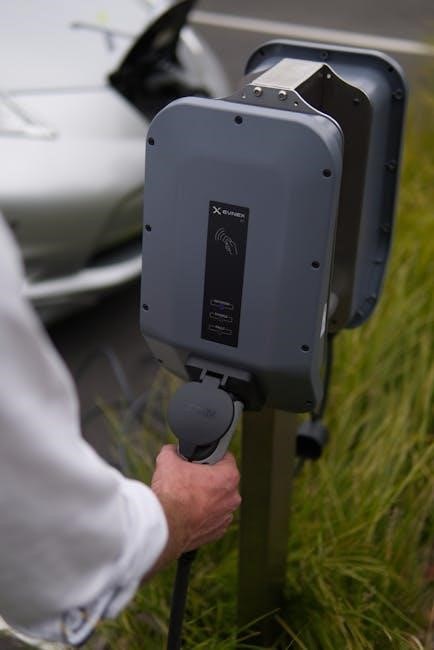
Wiring and Connections
Proper wiring is paramount for safe and efficient operation of your MPPT solar charge controller․ Always disconnect all power sources – solar panels and batteries – before commencing any wiring․ Use appropriately sized wiring, considering both current capacity and voltage drop to minimize energy loss․ Consult the controller’s manual for specific wire gauge recommendations․
Secure connections are crucial; loose connections can cause voltage drops, overheating, and even fire hazards․ Utilize proper crimping tools and connectors designed for solar applications․ Ensure all connections are tight and corrosion-free․ Polarity is critical – reverse polarity can instantly damage the controller and potentially the batteries․
Follow a systematic approach: connect the solar panels first, then the batteries, and finally the load․ Grounding the system appropriately is essential for safety, protecting against electrical shock and lightning strikes․ Double-check all connections before re-establishing power, referencing the wiring diagram in your manual․
Connecting Solar Panels to the Controller
Before connecting, verify your solar panel array’s voltage falls within the MPPT controller’s input voltage range․ Exceeding this range can damage the unit․ Ensure panels are oriented for optimal sunlight exposure, minimizing shading․ Use MC4 connectors for secure and weatherproof connections to the controller’s designated solar input terminals․
Pay close attention to polarity – positive (+) to positive and negative (-) to negative․ Incorrect polarity will likely damage the controller and void the warranty․ For multiple panels in series, the voltages add up; in parallel, the currents add up․ Configure your array to match the controller’s specifications․
Securely mount the controller in a well-ventilated location, away from direct sunlight and moisture․ Double-check all connections before applying power․ A dedicated DC disconnect switch between the panels and controller is highly recommended for safe maintenance and troubleshooting․ Regularly inspect connections for corrosion or looseness․
Connecting Batteries to the Controller
Prior to connecting batteries, confirm the battery voltage matches the controller’s setting․ Incorrect voltage settings can lead to undercharging or overcharging, damaging the batteries․ Use appropriately sized cables – thicker cables minimize voltage drop, especially over longer distances․ Ensure the cables are rated for the maximum current your system will produce․
Strictly adhere to polarity when connecting the battery: positive (+) to positive and negative (-) to negative․ Reverse polarity can instantly destroy the controller and potentially cause a fire․ A fuse or circuit breaker should be installed as close as possible to the battery’s positive terminal for overcurrent protection․

Securely tighten all connections to prevent arcing and voltage drops․ Regularly inspect battery terminals for corrosion and clean them as needed․ Consider using a battery temperature sensor for optimal charging profiles, especially in extreme climates․ Disconnect the load before making or breaking battery connections․
Load Control and Settings
MPPT controllers often feature load control, allowing you to automatically disconnect loads when the battery voltage drops to a predefined level, preventing deep discharge and extending battery life․ These settings are crucial for critical loads requiring consistent power․ Configure the “low voltage disconnect” (LVD) point based on your battery type and acceptable discharge level․
Many controllers offer programmable timers for load control, enabling scheduled operation of devices like lights․ Adjust settings carefully to match your specific load requirements and avoid unnecessary cycling․ Some controllers support a “load boost” function, temporarily increasing the charging current to support high-demand loads․
Review the controller’s manual to understand all available load control options and their impact on system performance․ Incorrect settings can lead to frequent load disconnects or insufficient power delivery․ Regularly monitor load behavior to ensure settings remain optimal and adjust as needed based on seasonal changes or load additions․
Programming and Customization
Modern MPPT controllers offer extensive programming options, allowing users to tailor performance to specific battery types, system voltages, and environmental conditions․ Access these settings through a control panel, LCD screen, or dedicated software interface․ Correct programming is vital for maximizing efficiency and protecting your investment․
Key customizable parameters include battery charging algorithms (e․g․, flooded, AGM, gel, lithium), equalization voltage and duration, temperature compensation, and voltage setpoints for charging stages․ Temperature compensation adjusts charging voltage based on ambient temperature, preventing overcharging in hot weather and undercharging in cold weather․
Always consult the controller’s manual before making any changes to the default settings․ Incorrect programming can damage batteries or reduce system performance․ Back up your settings before making significant adjustments, and document all changes for future reference․ Some controllers allow remote monitoring and control via IoT connectivity․
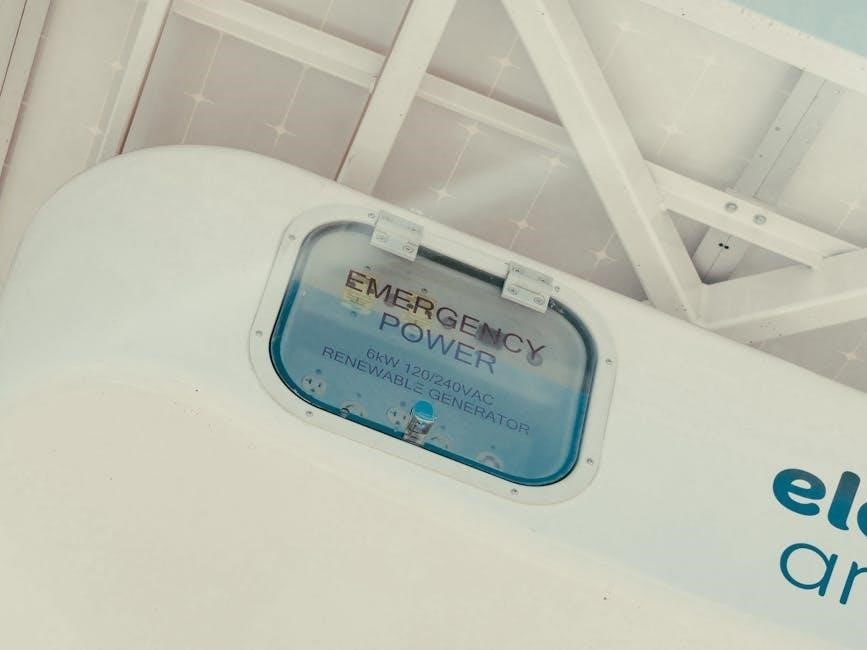
Display and Indicators
MPPT solar charge controllers typically feature a display, ranging from simple LED indicators to comprehensive LCD screens, providing crucial system information at a glance․ These displays show real-time data like battery voltage, charging current, load current, and overall power generation․ Understanding these indicators is essential for monitoring system health and performance․
Common indicators include battery charge status (full, charging, low), fault alerts (overvoltage, undervoltage, overload), and operating mode (MPPT, bulk, absorption, float); LED indicators often use color-coding (green, yellow, red) to quickly convey system status․ More advanced LCD screens may display historical data, graphs, and detailed error messages․
Familiarize yourself with the specific indicators on your controller model․ The manual will explain the meaning of each display element and provide troubleshooting guidance․ Regularly checking the display can help identify potential problems early, preventing damage and ensuring optimal system operation․ Some controllers offer remote monitoring via mobile apps․
Troubleshooting Common Issues
Even with proper installation, issues can arise․ A common problem is low battery voltage, often caused by insufficient sunlight, undersized solar panels, or a faulty connection․ Check wiring and panel output․ Overvoltage errors indicate a problem with the solar panel array or controller settings; immediately disconnect the panels․
Another frequent issue is the controller not charging․ Verify battery compatibility, check the battery’s state of health, and ensure proper connections․ If the load isn’t functioning, confirm the load settings and check for overload conditions․ Fault codes displayed on the controller’s screen are invaluable; consult the manual for their meaning․

Regularly inspect wiring for corrosion or damage․ Ensure all connections are tight and secure․ If problems persist, consult a qualified solar technician․ Remember to prioritize safety – disconnect power before attempting any repairs․ Documenting troubleshooting steps can aid in future diagnosis and prevent recurring issues․
Safety Precautions
Working with solar energy systems involves electrical hazards․ Always disconnect all power sources – solar panels and batteries – before performing any installation, maintenance, or troubleshooting․ Wear appropriate personal protective equipment (PPE), including insulated gloves and eye protection․ Never work alone; have someone nearby in case of emergency․
Be cautious of high voltages and currents generated by solar panels, especially in bright sunlight․ Ensure all wiring is properly insulated and protected from physical damage․ Avoid short circuits, which can cause fires or equipment failure․ Properly ground the system to prevent electrical shock․

Batteries produce explosive gases during charging; ensure adequate ventilation․ Avoid sparks or open flames near batteries․ Follow the battery manufacturer’s safety guidelines․ If you are uncomfortable working with electrical systems, consult a qualified solar installer․ Prioritize safety above all else to prevent injury or damage․
Maintenance and Care
Regular inspection is key to a long-lasting MPPT controller․ Periodically check all wiring connections for tightness and corrosion, ensuring secure contact․ Clean the controller’s exterior with a dry cloth to remove dust and debris, preventing overheating․ Monitor battery voltage and state of charge regularly to identify potential issues early․
Inspect the solar panel connections for any signs of damage or weathering․ Verify that the controller’s cooling fan (if equipped) is functioning correctly, maintaining optimal operating temperature․ Review the controller’s display for any error messages or unusual readings, addressing them promptly․
Keep the surrounding area clear of obstructions to allow for proper ventilation․ Consider annual professional inspection to assess overall system health․ Following these simple maintenance steps will maximize the controller’s lifespan and ensure reliable performance, safeguarding your solar investment․
Market Trends and Future Developments
The global charge controller market is experiencing significant growth, driven by increasing adoption of off-grid solar systems and renewable energy initiatives․ A key trend is the integration of IoT (Internet of Things) technology, enabling remote monitoring and control of MPPT controllers, as seen with Everon Energy Systems’ new offerings․
Expect further advancements in MPPT algorithms, maximizing energy harvest even under challenging conditions like partial shading․ Increased focus on bi-directional controllers, supporting battery storage and grid-tie applications, is anticipated․ Miniaturization and cost reduction are ongoing goals, making MPPT technology more accessible․

Demand for controllers with advanced communication protocols, like CAN bus and Modbus, will rise, facilitating seamless integration with energy management systems․ Schneider Electric’s MPPT 100 exemplifies the trend towards user-friendly, self-reliance focused solutions․ Future controllers will likely incorporate AI for predictive maintenance and optimized performance․